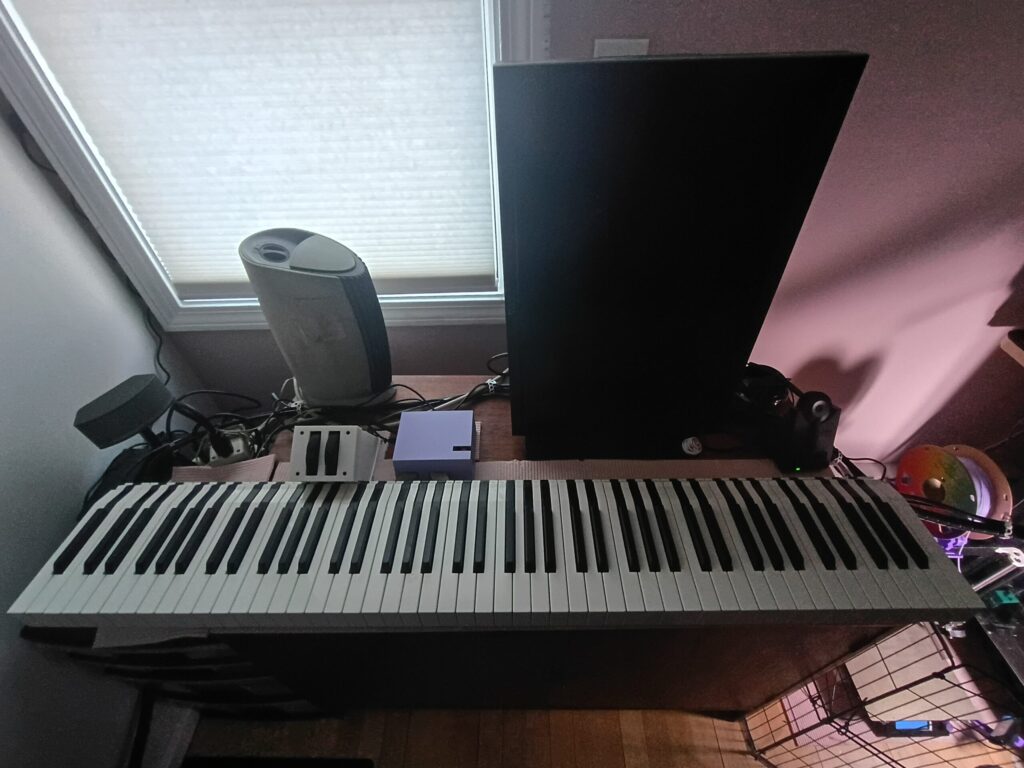
My SL-880’s electronics have slowly been dying since I got it used in 2011. At first you would have to turn it on and off a few times before it would work, after a few years this became a few dozen times, recently I couldn’t get it to work after 100 times and started looking for a replacement.
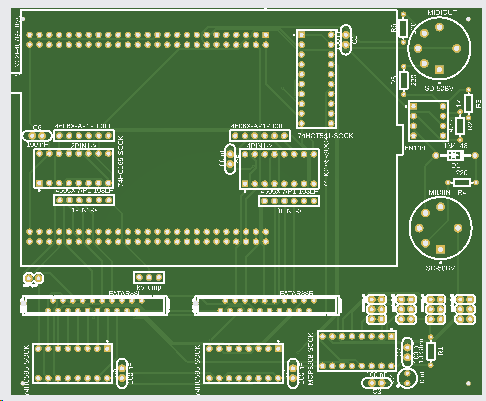
I settled on MIDIbox KB since I couldn’t really find a lot of details about the key bed on this model and MIDIbox KB offers a lot of options to work with diverse and weird setups. I didn’t like the modularity of the boards available for sale, so I decided to make my own.
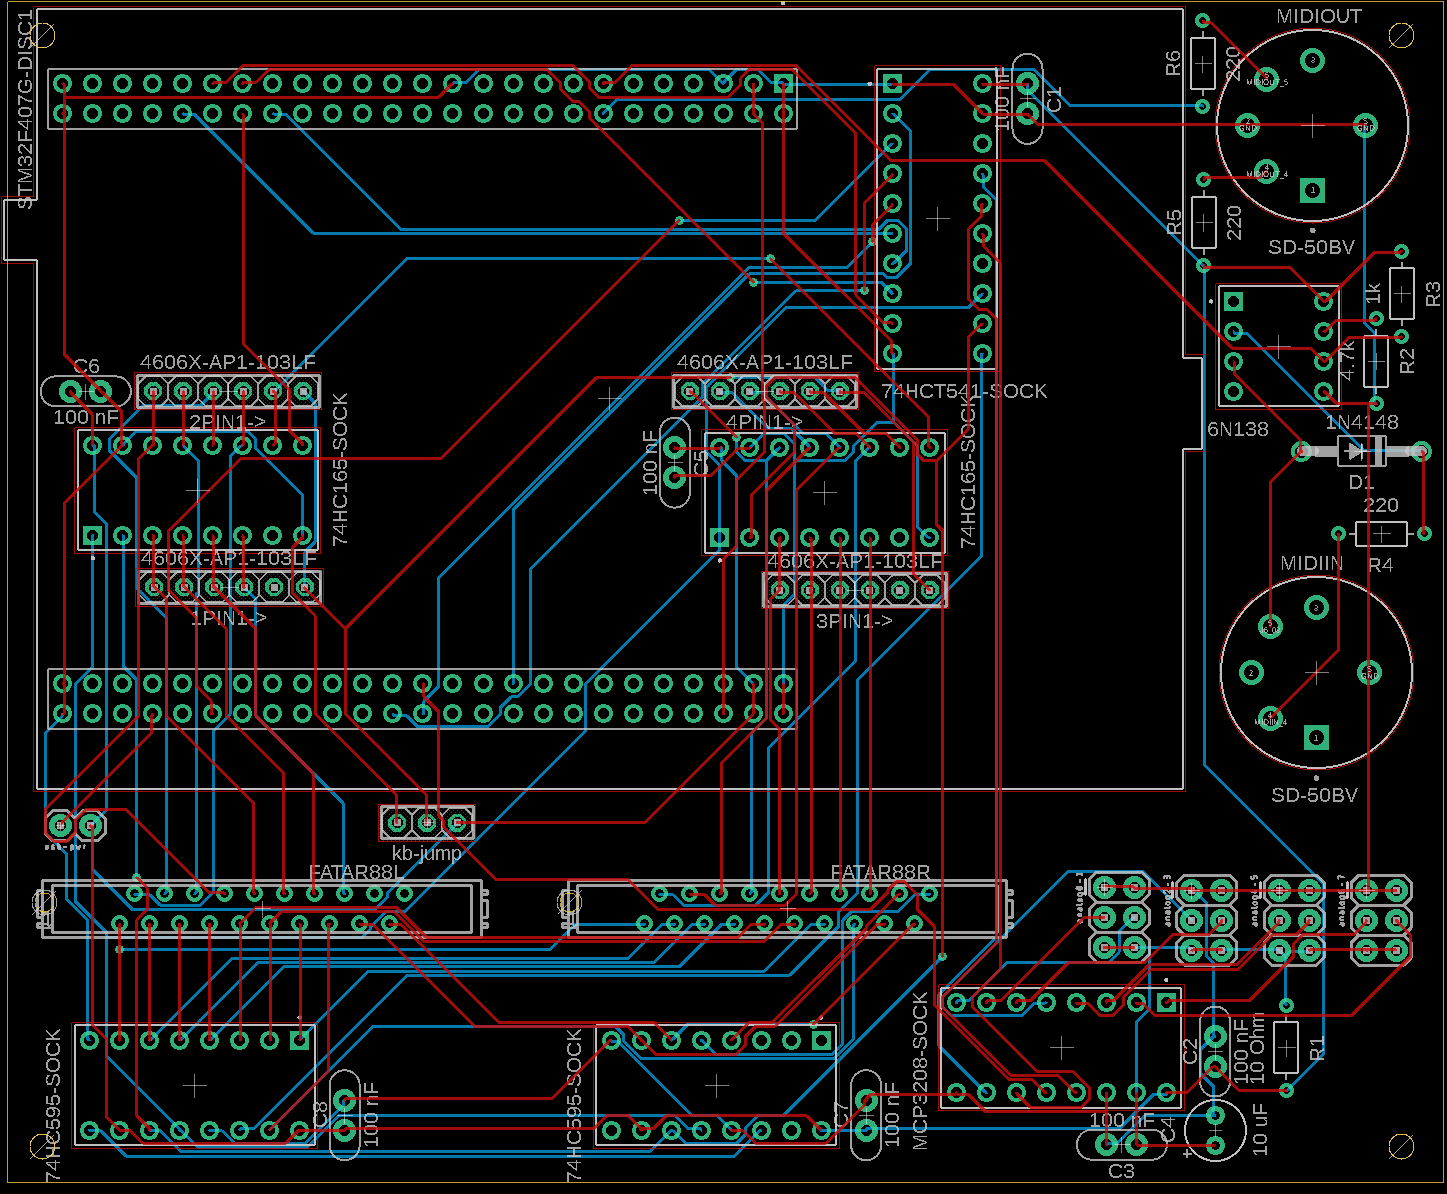
Note that the rest of the board images and files are a revision from what I had fabricated and has not been tested. Leave a comment if you want the original (the labeling of the AIN pins is wrong, and you need a custom build to use the 2nd AIN module). I’m not actually using 4 of the AIN and the MIDI so if I was to make another revision, I would take those off and squish the board down a little bit. I’d also add a place to put in pull-up or -down resistors on the AINs.
This is a bit chaotic, but hopefully it helps. I used IC sockets but they aren’t really necessary.
symb
quant
desct
package
label
part
digikey part
1PIN1->, 2PIN1->, 3PIN1->, 4PIN1->
4
4606X-AP1-103LF
4606X-AP1-103LF
4606X-AP1-103LFCT-ND
C1, C2, C3, C5, C6, C7, C8
7
Capacitor – Generic
CAP-THRU-2.54MM
100 nF
478-3193-nd
C4
1
Capacitor Polarised – Generic
CAPPRD254W65D500H1150B
10 uF
mouse r 871-b41827a6106m000
D1
1
Diode Rectifier – Popular Parts
DO41-10
1N4148
1N4004
4878-1N4004CT-ND
J1
5
Check availability
AMPHENOL_DILB16P-223TLF
16p ic socket
2057-ICS-316-T-ND
J2
12
Multi connection point.
2X3
2 row header
609-10063545-400HLFCT-ND
J6
1
Check availability
AMPHENOL_DILB8P-223TLF
8p ic socket
2057-ICS-308-T-ND
J7
5
Multi connection point.
1X02
1 row header
609-77311-418-00LFCT-ND
MIDIIN, MIDIOUT
2
Check availability
CUI_SD-50BV
SD-50BV
CP-3150-ND
R1
1
Resistor Fixed – ANSI
RESAD724W46L381D178B
10 Ohm
10qbk-nd
R2
1
Resistor Fixed – ANSI
RESAD724W46L381D178B
4.7k
4.7kqbk-nd
R3
1
Resistor Fixed – ANSI
RESAD724W46L381D178B
1k
1.0kqbk-nd
R4, R5, R6
3
Resistor Fixed – ANSI
RESAD724W46L381D178B
220
10qbk-nd
U$1
1
AMPHENOL_DILB20P-223TLF
20p ic socket
2057-ICS-320-T-ND
U$6
2
MICROMATCH-20
2-338068-0
A99499CT-ND
U1
1
Check availability
MODULE_STM32F407G-DISC1
STM32F407G-DISC1
STM32F407G-DISC1
497-16287-ND
1
MCP3208
MCP3208-CI/P-ND
1
6N138
160-1795-ND
1
74HCT541
296-1619-5-ND
2
74HC165
296-12790-5-ND
2
74HC595
296-33112-5-ND
2
25×2 femail header
S9201-ND
MIDIbox KB settings
set kb 1 note_offset 21 set kb 1 rows 12 set kb 1 velocity on set kb 1 optimized on set kb 1 dout_sr1 1 set kb 1 dout_sr2 2 set kb 1 din_sr1 1 set kb 1 din_sr2 2 set kb 1 din_key_offset 40 set kb 1 din_inverted off set kb 1 break_inverted off set kb 1 delay_fastest 50 set kb 1 delay_slowest 1000
set kb 1 make_debounced on set kb 1 ain_pitchwheel 128 set kb 1 ctrl_pitchwheel 128 set kb 1 ain_modwheel 129 set kb 1 ctrl_modwheel 7 set kb 1 ain_expression 130 set kb 1 ctrl_expression 129 set kb 1 ain_sustain 131 set kb 1 ctrl_sustain 64
Cable attachment
The key cable ribbon from the left goes to the left and right to right. I put the pitch wheel on the leftmost AIN pin my colors were
purple (goes to contact on both wheels) = 5v (closest to edge)
blue (goes to casing of both wheels) = ground (closest to center of board)
grey (goes just to pitch wheel) = signal (between 5v and ground)
The mod wheel (used for volume) I put next and shares the 5v and ground of the pitch wheel so only
green (goes just to mod wheel) = signal
The channel aftertouch I put next, the two signals have to be combined together, the pinout probably doesn’t matter as long as 5v goes to both ribbon cables and signal combined goes to both as well. Consider using a pull-down resistor.
white = 5v
yellow = 5v
blue + black = signal
Last, I bought a 6.35mm TS jack with pigtail for my sustain pedal; one wire goes to 5v the other goes to signal, doesn’t really matter which, but the tip should be 5v really. Consider using a pull-down resistor.
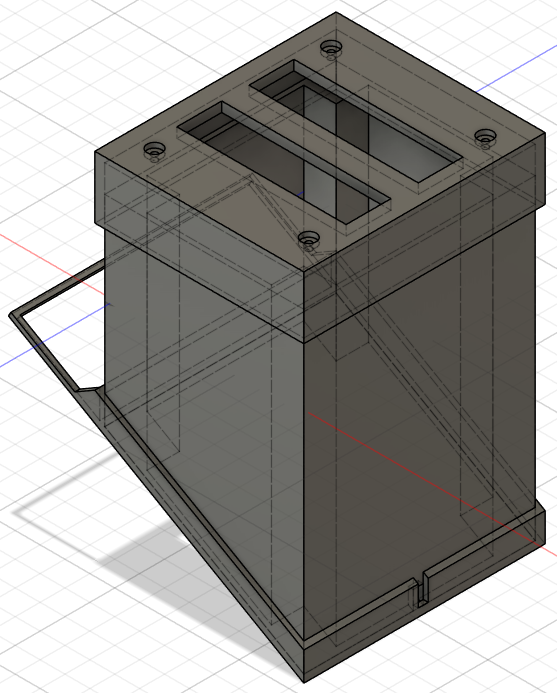
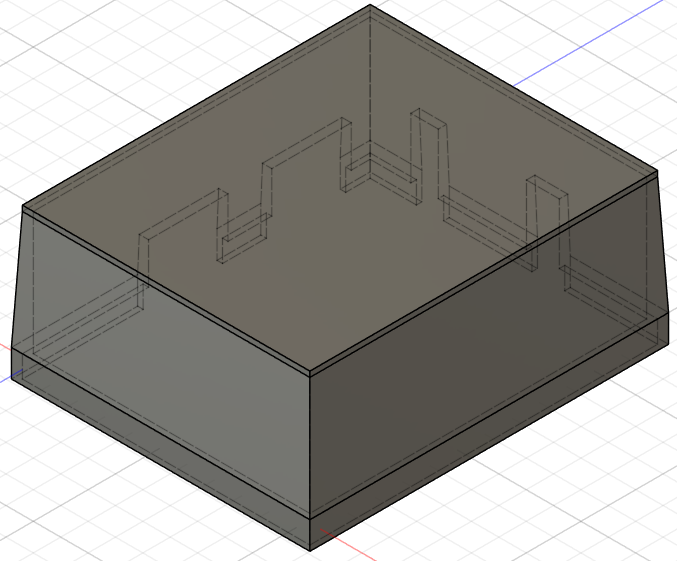
Case
I used some cable wrap for my AIN cables and made my 3D-printed case so that you can lift it off without undoing cables. Note the images are not the latest version.
If you disable IPv6 under Linux in the one of the following ways: sysctl net.ipv6.conf.all.disable_ipv6=1
sysctl net.ipv6.conf.default.disable_ipv6=1
(Most likely what your GUI is doing if you disable IPv6)
and try to run Hamachi you will encounter these errors: hamachid: tap: ioctl(SIOCSIFADDR) IPv6 err, 13, Permission denied
avahi-daemon: IP_ADD_MEMBERSHIP failed: No buffer space available
systemd-udevd: Could not generate persistent MAC address for ham0: No such file or directory
To resolve the issue re-enable IPv6 and disable it for all interfaces but ham0. The following should give you a list of commands to run that will do this: sysctl -a | grep disable_ipv6 | grep -v -e all -e default -e ham0| cut -d . -f 4 | xargs -I{} echo 'echo "net.ipv6.conf.{}.disable_ipv6 = 1" >> /etc/sysctl.conf'
You should only consider doing this if you have other security measures in place to prevent access to the interface.
vim /usr/lib/python2.7/dist-packages/deluge/ui/web/js/deluge-all.js:deluge.LoginWindow (near the end, replace the onShow function): onShow:function(){this.onLogin();}
vim /usr/lib/python2.7/dist-packages/deluge/ui/web/auth.py (comment out the if statement and add return True): #if s.hexdigest() == config["pwd_sha1"]: # return True return True
If you want to take advantage of IntegrityStreams on non-mirrored partitions (which you can create on Windows 8.1 by creating the DWORD HKEY_LOCAL_MACHINE\SYSTEM\CurrentControlSet\Control\MiniNT\AllowRefsFormatOverNonmirrorVolume and setting it to 1) and you forgot to use the /i enable option with format you can use Powershell to easily add the attribute both for new and existing files.
Set-FileIntegrity driveletter:\ -Enable $true
will set the partition so that new files are created with IntegrityStreams.
Get-ChildItem driveletter:\ -Force -Recurse | where-object { $_.Attributes -notlike “*IntegrityStream*” } | ForEach-Object {Set-FileIntegrity $_.FullName -Enable $True }
will enable IntegrityStreams on any directories and files that don’t have them enabled.
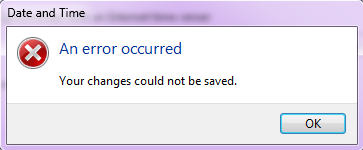
If you have noticed your Windows 7 machine’s time being off then you should enable time syncing (right click on your time, click Adjust time/date, Internet Time, Change settings…, Synchronize with an Internet time server). However if you are running Windows 7 x64 (you can find out by going to Start, right click on Computer, Properties, and look for System type: 64-bit Operating System on the screen that pops up), this may fail or display “Date and Time: An error occurred: Your changes could not be saved.” if you try and change the time server (I like to use tick.usno.navy.mil).
The 1E media server motherboard died about a few months ago. In order to fill the void and give the server a more permanent home, the two machines were merged. The Ubuntu/VMWare Server host has been retired. The system is now running Xen deployed on Debian. The server has two more GB of ram bringing the total up to 7GB. Furthermore, the data drive is on a software based RAID1 array with single redundancy (currently degragated due to a drive failed – apparently Seagate thinks 68m read errors is a SMART passing drive).
While trying to set up a bare-metal hypervisor, before settling on XCP, for the new server, I tried a number of configurations.
VMWare ESXi, which I believe I would still recommend as a first try, has problems with unbalanced memory, so if you aren’t willing to put out the money to properly balance your nodes skip it.
Oracle VM seems like a really great package but there are a couple things to watch out for. The base system is unable to work with NFS loopbacks, that is an NFS share hosted and mounted on the same machine. If you were thinking of doing this, don’t. Use iSCSI instead.
Also, you need to install Oracle VM Manager on some computer. You can run it in a VM but you need an external VM to set this up in the first place and it takes some resources. Alternatively, you can install it on the Oracle VM Server base system. There are some guides for doing this. I found this one to be especially good: http://www.pythian.com/news/30197/installing-oracle-vm-manager-3-0-3-under-dom0-host-or-how-to-save-resources-on-your-sandbox/ But, ultimately I was unable to get the system to work, it frequently crashed often resulting in database corruption (it might be that I was using Oracle XE instead of SE or EE).
My recommendation is to stay away from Oracle VM.
So far XCP has been a great system, albeit not very well documented (XenServer has good documentation that is mostly applicable, but there are a few differences). I will be adding some guides on working with XCP on this site soon.
Update: For ultimate control and easy installability in complicated disk setups, it seems that deploying Xen on Debian is the way to go.
The host OS, Debian 6.0.4 “squeeze”, is running Xen 4.0
The guest OS is what I like to call a PoSNMar stack.
PHP 5.3 through php-fpm with APC 3.1
openSUSE 12.2
Nginx 1.2
MariaDB 5.5
So far the server seems very fast, but the php-fpm tends to overuse memory. I’m still trying to track down the memory leak, most likely just need to set a lower max requests.
